
The idea of soundproofing a room yourself can be tempting, especially if you’re tired of noisy neighbours, and street traffic, or trying to create a peaceful home office. DIY soundproofing promises a cheaper alternative to professional installation, with countless online tutorials offering quick fixes. But is it worth the effort, or will you end up wasting time and money for minimal results?
Understanding the Basics of Soundproofing
Before diving into DIY soundproofing, it’s essential to grasp the concept of soundproofing itself. Soundproofing refers to blocking sound from entering or leaving a room, while sound absorption reduces the echo or reverberation inside a space. Many DIY methods focus more on the latter, improving room acoustics rather than fully blocking out external noise.
Effective room soundproofing typically requires materials and techniques that either block, absorb, or dampen sound waves. These solutions often involve heavy, dense materials that prevent sound from travelling through walls, floors, and ceilings. So, how do the DIY solutions stack up?
Common DIY Soundproofing Methods: Do They Work?
When it comes to DIY soundproofing, several methods are often recommended. But how effective are they, and do they offer real noise reduction?
1. Adding Weatherstripping and Door Sweeps
One of the simplest and most cost-effective DIY soundproofing methods is sealing gaps around doors and windows with weatherstripping and door sweeps. These small gaps can let a surprising amount of sound through.
- Effectiveness:
- Reduces noise leakage through cracks and gaps.
- Best for blocking moderate noise, such as conversations or street sounds.
- Limitations:
- Won’t stop low-frequency noise (e.g., traffic, loud music).
- Won’t address noise transmission through walls or floors.
2. Hanging Heavy Curtains or Blankets
Thick, heavy curtains, known as blackout or soundproof curtains, can help absorb sound, particularly when covering windows or bare walls. Similarly, hanging blankets or quilts on walls can reduce echo inside a room.
- Effectiveness:
- Helps reduce echo and reverberation.
- Minimally blocks noise entering through windows.
- Limitations:
- Won’t stop loud or persistent noises from outside.
- Only reduces sound, not blocks it entirely.
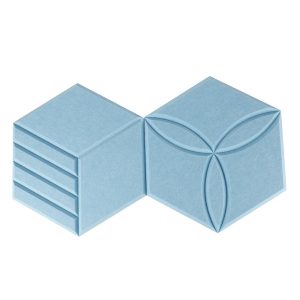
3. Using Acoustic Panels or Foam
Acoustic panels and foam are designed to absorb sound within a space, improving room acoustics by reducing echo and reverberation. Many DIYers place these on walls or ceilings to improve sound quality, especially in home studios.
- Effectiveness:
- Effective for improving internal room acoustics.
- Great for reducing echo or noise bouncing off hard surfaces.
- Limitations:
- Won’t prevent external noise from entering or leaving.
- Primarily a sound-absorption tool, not a soundproofing solution.
4. Installing Rugs and Carpets
Hard floors can cause sound to bounce around, making a room noisier. Adding thick rugs or carpets can absorb sound and reduce footfall noise, making it a popular DIY solution.
- Effectiveness:
- Helps reduce internal noise and impact sounds (e.g., footsteps).
- Adds comfort and can make the space feel quieter.
- Limitations:
- Won’t block airborne noise from outside.
- Only works for reducing noise from above or below.
5. Filling Gaps with Caulking or Acoustic Sealant
Similar to weatherstripping, filling cracks or gaps in walls, floors, and ceilings with acoustic sealant can prevent sound from sneaking through small openings.
- Effectiveness:
- Useful for sealing air gaps that let sound through.
- Affordable and easy to apply.
- Limitations:
- Won’t block low-frequency sounds or prevent noise from passing through solid structures.
6. Mass-Loaded Vinyl (MLV) Sheets
One of the more advanced DIY methods is using mass-loaded vinyl (MLV). MLV is a dense, flexible material that can be installed on walls, floors, or ceilings to block sound. It’s often recommended as a heavy-duty DIY option.
- Effectiveness:
- Good at blocking low-frequency sounds.
- Can be applied to various surfaces for effective soundproofing.
- Limitations:
- Can be expensive and tricky to install properly.
- Requires additional finishing (like drywall) to look aesthetically pleasing.
Pros and Cons of DIY Soundproofing
While DIY soundproofing methods have their advantages, they’re not always the ultimate solution for serious noise problems. Here’s a look at the pros and cons:
Pros of DIY Soundproofing:
- Cost-Effective: Most DIY soundproofing solutions are affordable and can be installed with minimal investment.
- Easy to Implement: Basic solutions like adding weatherstripping, curtains, or rugs can be done without professional help.
- Improves Room Acoustics: Many DIY methods, such as acoustic panels and rugs, are great at absorbing sound and reducing internal noise.
Cons of DIY Soundproofing:
- Limited Effectiveness: DIY methods often fall short when it comes to fully blocking out external noise, especially low-frequency sounds like traffic or music.
- Temporary Fixes: Many DIY solutions offer short-term noise reduction but don’t address the root cause of sound transmission through walls, floors, or ceilings.
- Requires Multiple Layers: For noticeable results, several layers of DIY soundproofing (e.g., rugs, curtains, sealant) may be needed, which could still be less effective than a professional solution.
- Aesthetic Concerns: Some DIY solutions, like blankets on walls or MLV sheets, may not look great without additional finishing or cover-ups.
When DIY Falls Short: Professional Soundproofing
While DIY soundproofing methods can offer minor improvements in noise reduction, they’re unlikely to deliver complete soundproofing. If you’re dealing with constant or loud noise, such as living next to a busy street or a noisy neighbour, you may need to consider professional soundproofing.
Professional soundproofing often involves installing materials like acoustic insulation, soundproof drywall, or decoupling systems to create a sound barrier. These methods are more costly but offer long-term, effective solutions for serious noise issues. For example, double-layered walls or insulated windows can significantly reduce noise transmission, something that DIY methods like curtains or rugs just can’t achieve.
Conclusion: Is DIY Soundproofing Worth It?
The answer depends on your noise problem and expectations. If you’re simply looking to reduce echo or internal noise in a room, DIY soundproofing can be a great, affordable option. Simple fixes like weatherstripping, curtains, and acoustic panels can make a noticeable difference without breaking the bank.
However, if you’re expecting to block out loud external noise or achieve professional-grade soundproofing, DIY solutions may disappoint. They tend to offer minimal noise reduction for serious issues, and more significant investments or professional installations may be necessary to truly soundproof a room.
So, is DIY room soundproofing a waste of time and money? Not entirely—but it’s crucial to know what you’re aiming to achieve. For moderate noise control, DIY can work just fine, but for long-term, effective soundproofing, a professional approach may be the only way to truly silence the noise.
Would you like more details on specific DIY methods, or advice on when to seek professional soundproofing?